When I stand before God at the end of my life, I would hope that I would not have a single bit of talent left and could say, "I used everything you gave me, Lord." I am a believer that God created each one of us with a unique talent, therefore, use it well to serve Him.

Saturday, March 19, 2011

NCM Project #13 - Wedding Gift Bag

There are two things I love about gift giving.  First is the shopping then the second is gift wrapping.  People who knew me knows that I pay so much attention on small details.  And as much as possible I love dressing up my gifts if only possible.  Since I was the one who made the gift for Lia's friends who are getting married next month.  I thought I should be the one to wrap it up too. 

All the nice gift boxes in our house won't fit and the only thing available in my house as of the moment are orange and red paper bags, which I would never use for a turquoise-ivory motif.  I started looking around the house again and couldn't find anything but came across with a blue poster sheet.  Thought I could make my own gift bag.  Since I was so eager to get this project done, I just started adhering, scoring the poster sheet without actually making sure of the siz.  As a result, I just screw-up my very last chance to make a gift bag.  I was really frustrated because deep inside I knew that I don't have a choice but use the orange or red bags I have.

They said that "Necessity is the mother of all invention."  Would you still think that this was an orange gift bag?

 I covered each sides of the orange bag with ivory colored CS and added baby blue trimmings and I think I was successful in hiding its original color.
 I want the bag to look clean yet elegant, so I added embellishment that fits in the occasion/event. 
 I also added lacy lace on the top as added top on the blue trimmings and also used it for handle.  I also used a blue flower eyelet to keep the punch hole a lot stronger.
 Added the same ivory colored tulle that I used for the guestbook.
 Also added a string of semi-precious stones and beads and finished it with charm initials and heart.
 Originally, I was planning to put a diecut wedding cake as a centerpiece for the bag but changed my mind since I need something to place the giftcard.  So what I did was make a pocket made from plastic sheet and vellum quotes and adhere it in the front of the bag.
 This is the gift card I made...
 
Would you still think that this nag used to be real orange in color?
 
 A closer look on the beaded strings....

Hope it pass your taste!

NCM Project #12 - Wedding Guestsbook

A neighbor who is now a dear, dear friend, and I are becoming really close and spending alot of time talking, going out and doing things together. Like I mentioned several times in my blog, she's very kind to us, driving us where we need to go and even grabbing grocery stocks for us.  In return,  I love making her something that I made and most of the time its either food or crafting projects.  Couple weeks ago, she asked me if I would be willing to make her a wedding guestbook and scrapbook for her friends who are getting married in April.

Color motif are turquoise and ivory.  Again, I used a thick plastic sheet I got from Grafix Arts as a cover. 
 I framed the couples picture that I took from the wedding invitation.  Added Prima flowers, letter charms, sticker sentiments (from Philippines), diecut flowers and acrylic frame.  If you noticed the acrylic frame matches the card.  To be able to come up with the same color as the paper, I wet a cotton ball with rubbing alcohol and put a drop of SU reinker.
 I used April Shower cartridge for the panel sheets.  I used chipboard sheets then sandwiched it with CS.  I did it that way to make sure each panel will not get wrinkle by people who are signing it.  I added diecuts and tiny flatback pearls as a embellish on each pages.
 I asked Lia whether she prefers a guestbook that has lines on it.  I suggested to go with guestbook/wishbook, so guests can leave comments, advices or just plain well wishes to the couple and she took my advice for it.  That should explain why its plain inside.
 I used Stampin Up! CS for the color turquoise and I used Gina K luxury paper for color ivory.  Then I used Wassau for the metallic gold for diecut images.  I used the cartridge Botanical for the diecut.
 I'm not sure if you can see in this picture the plastic sheet cover I used.  I dressed it up with ivory colored tulle that has glitters, satin ribbon, pearl string/garland and a pair of wedding bands.
I made a total 15 (30 pages back to back) panels for the guestbook and hopefully that will be enough for the couple's guests to write on.
 I cut all the panels using Cricut machine but what I don't understand was the CS was cut differently from chipboard.  Trimming each pages and sanding them afterward was extra work that I didn't expect.  What's bad was I had to sufferer for days for sinusitis headache because of the dust I got from the papers while sanding it.  Also, I used my Xyron big sticker machine for each flower diecuts and it suppose to make thing easy, instead I ended up erasing extra adhesive, which was a tedious job.  I hate seeing adhesives on any projects.

At the end, I was pleased with this project even if it took so long to finish it.  Someone was so happy too with it and cant stop from saying WOW.  Hopefully her friend would like it and so do you!

Thanks for looking and for keep on posting your projects at our NCM challenge.

NCM Project # 11 - A Scrapbook Wallclock

Finally, at 230 AM I got done with my project I was working on for more than a week now.  Since I was still all worked-up from doing it, I started another project.  Couple years ago I've seen a handmade wallclock and thought that it was an interesting project.  Way back then, I bought a square and a circle wallclocks from Oriental Trading but sadly I didn't get all the parts that supposed to go with it.  Luckily I grabbed a bunch of wallclock parts at Hobby Lobby the last time we were there. 

So without further ado, here's my very own version of wallclock project...

RECIPE:
PAPER: Bo Bunny and Bazzill Basic Paper
TOOLS: Cricut Expression, Gypsy, PC paper trimmer, ATG, Zig 2-way glue pen, Modge Podge and Xyron sticker maker
CARTRIDGE: Songbird (font)
EMBELLISH: K & Company Vellum Quotes Titles "Families are Forever" and rub-ons from Art Arehouse
OTHERS: wallclock from Oriental Trading and clock from Hobby Lobby and wrench

Hope you like this project and would be willing to try it too...

Thursday, March 17, 2011

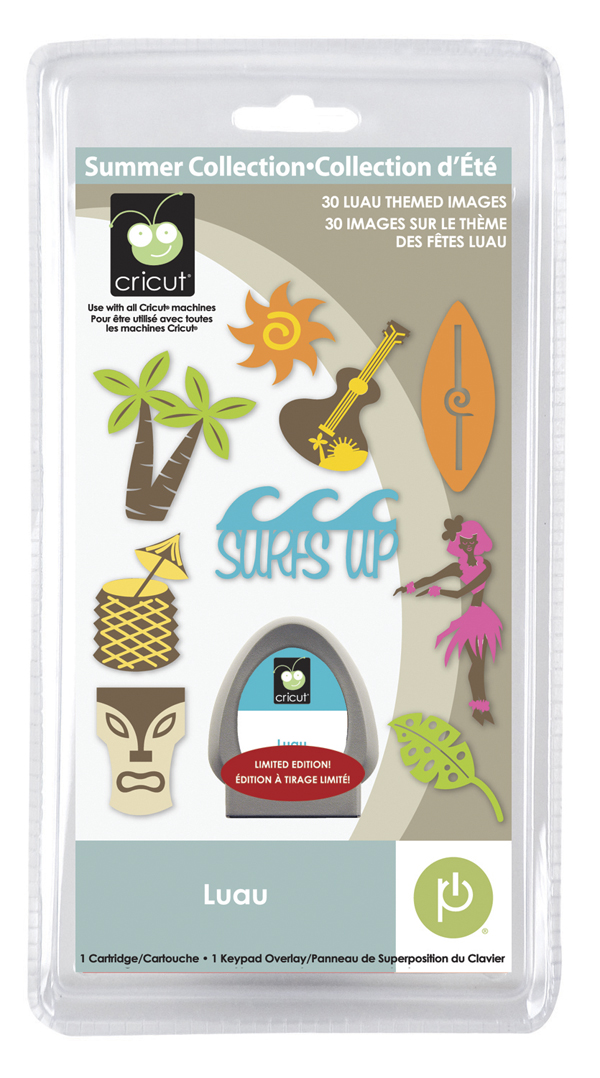
Newly Released Cricut Cartridges

Hello Peeps, I know I've been MIA for almost a week now. No worries I'm still around and just being bummed out.  The project I'm working on is taking awhile to get done. Anyways just want to update you on the newly-releases of Cricut cratridges. I am so excited and I do wish that PCP will get their prices in order so I can start buying the carts that I want. Okay, enough of the blah, blah, blah...

Here they are:

 Damask
 
 
 Elegant Edges
 
 
 Everyday Pop-up Card
 
 
 Father's Day Seasonal
 

Goodluck Graduate Seasonal
 

 Luau Seasonal
 
 Pop-Up Neighborhood - Cricut Circle Exclusive


Love it??? I do!  Gotta have them all LOLz...

Keep on posting your projects for the National Craft Month Challenge.  I'll be back pretty soon.  Y'all take care!

Hugs from me to you...


Friday, March 11, 2011

NCM Project #10: Crafting Day with My Kids

Today, our kind neighbor and friend, Lia, took us to Lowe's so I can get bags of red mulch for our yard.  Then, I offered to treat her to lunch but Yank Sing (Chinese Resto) was still closed by the time we got out of Lowe's.  So to kill time,  we went to Hobby Lobby.  Like usual, I can never get out of a craft store empty handed.  I bought myself a set of clock parts, lollipop sticks and goody bags.  I wanna be able to make some cake pops again and I want it this time to have the things that I needed.

Ella made an awesome job in finally learning how to count, read and write 1-100 last night.  I thoguht of giving her a break today and just let her do crafting.  Yeah, I know, craft store gives me bad ideas LOLz...  I let my kids picked whatever they want (it was non-stop until I finally said NO!).  We got home, ate lunch, took a long nap and then made some wonderful projects.  I know that my kids mostly done these projects with very little help from me but still I want to enter it as NCM Project #10.  Hope you'll like them!  I think my kids got my art/craft inclination LOLz.... 
This is what's currently in my craft table right now.
Ella made this 3-D foam Castle project with some help from her brother Jack.  I also helped but only with the gluing (white and hot glue) and with sticking those chenille wires.  I noticed how she clearly follows the instructions in the box, how she was very particular with aligning the stickers with the foam and she kept on saying that those flower layers can't be the same colors.  I was so proud of her.  At 6 she already pays so much attention to small details.  Funny though, because at the end she told me that it was a lot work, LOLZ...
She also made this cute little girl using the perlerbeads.  She almost give up on this.  The beads kept on getting out of the pegboard and it was really hard to pick them up.  Told her not to give up and told her that she needs patience if she wants to become a good crafter.  I also showed her a trick on how she could put the beads without messing up what she'd done.  I gave her my Justrite stamp tweezer too (which is not too sharp in the end). She finished it although I was the one to iron it.  It needs ironing to fuse beads.  I also helped her to put a twine on it. She said she would like to make more of this.  She thinks it was a nice addition to our Christmas tree ornaments.
Here's what Jackie made for the day.  It is basically a mosaic project using a colored pop-dots and foam squares.  Boy, the leftover foams were all over my craftroom now...

I'm so proud of my kids.  The efforts they've put in their projects is worth all the money that I spent on these craft kits.  Now, they still bug me to do more projects but unfortunately, I have some deadlines to meet.  

That's it for the night.  Glad I got myself an SD card today.  My posting was delayed because my small camera is not working and somehow it screw-up my SD card too.

Nyt peeps.  Keep on posting your projects.  Remember the more you post that better chances of you to get this yummy GIVEWAYS.  Also, don't forget to join in my BIRTHDAY GIVEAWAYS!