When I stand before God at the end of my life, I would hope that I would not have a single bit of talent left and could say, "I used everything you gave me, Lord." I am a believer that God created each one of us with a unique talent, therefore, use it well to serve Him.
Showing posts with label Christmas cards. Show all posts

Monday, December 13, 2010

My muse is missing yet I'm in the mood for...

My muse is missing yet I'm in the mood to dress-up some gifts to couple people. I wrapped the presents few days ago but goodness I couldn't come up with an idea for a card.  Finally this evening, I told myself, it's now or never.  The boxes has to go out in the mail tomorrow.  It wasn't easy at first but I was pretty pleased with the cards that would go with the gifts.  I assembled all the embellishments from scratch.  If you don't know yet, I'm a big collector of mini Christmas decor/ornaments and I'm taking them all with me to Europe.  Okay, no more babbling.  Here they are.  Have fun viewing them!
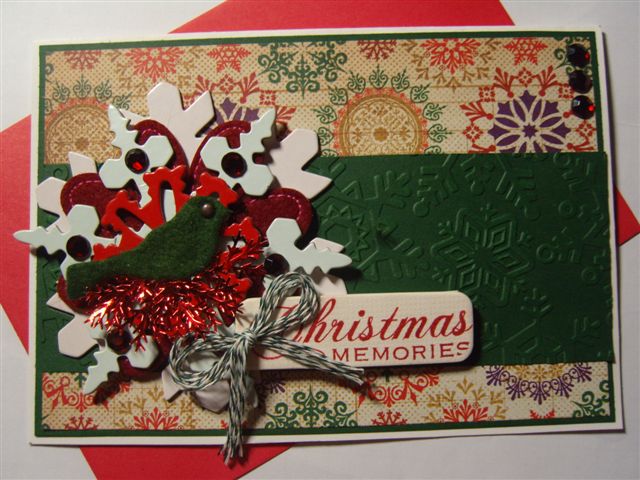
A card I made for my mother.  
I tried to keep the card simple, like I said my muse is MIA for almost a week now.  
I added felt bird and snowflake chipboard as embellishment.
The card was the last one I made among the batch.
  A box of chocolate that will go with a card.
See the candycane?  Rather than let it sit here in the house, I used the candycane as embellishment.  
Believe me, it's healthier that way...
I mostly used organza for my gifts.  I grabbed a bunch of these while we were still in
Lousiana  couple months ago.
I think the organza added an elegant touch on the gifts.
Another glimpse of the gift.
The gift and the card.  Hope it matches!
A card for a craft friend...
I used mostly old school embellishment like dew drops, brads and felt flower.
Still hoping that my muse would start to pick up.
This is the second card I made. I was still having a hard time putting things together.
The gift that goes with the second card...
I really like the cinnamon bark and mini wreath in this gift.
I used red organza on this gift.
I made this wreath from scratch
I'm really pleased with the outcome.
Like the rest, this will go postal tomorrow.
Hope the recipient will have many use for this gift
and the other stuff I added in her box.
Card I made for my sweet and loving DH.
Yeah, I know, I didn't notice that my bling was kindda crooked.
Don't worry, I got that fix before the box got sealed.
Again, in this card, I used candycane as embellishment and added mini Christmas decors.
This is the third card I made for the night.
My daughter bugged me that her Daddy needs a new wallet.  So we bought him a
nice Perry Ellis brown wallet. Spent a little on the big guy, he very well deserve some nice gifts.  
The wallet is just one of those gifts we got him.  Actually we are sending him two big boxes.
Two big boxes and I bought them all online.  He would be happy that I didn't go to the store.
I wish the boxes would still make it there in time for Christmas.
Hope DH will have lots of fun opening his gifts...
Another card I made for another friend.  This was my first attempt this evening.
This maybe simple but I really love it!
I finally get to try my new Spellbinder dies.  Love it!
The gift.
Again, I added cinnamon bark as embellishment.  Love it!
Hope my friend would like her gift too!

That's it for now.  Thanks for viewing.  Hope this is the start of a good crafting week.  Christmas is one of those occasions where you just wanna keep on making craft projects.

That's it for now.... I should have been in bed couple hours ago.  Hope I can still get up early to go to the PO.
Christmas is almost in the air.  My kids are so excited with their gifts...  I can't wait!

Nyt everyone!

Wednesday, December 1, 2010

Just Us Girls #61 - 3D Challenge

The Challenge for this week at Just Us Girls #61, is to simply add a 3-D holiday embellishments on your projects or cards.  Instead of just using the 3D embellishment as additional element on my project, I actually used it as the highlights for my card entry.  This is one good way of using up your stash that's collecting dust somewhere in your craftroom.   Here's my take and I made an easel card:


PAPER: DCWV
STAMP: Hero Arts (Sentiments)
INKPAD: Versamark
TOOLS: PC Paper trimmer, Fiskars edge punch, Marvy Uchida heat tool, ATG and Zip Dry
EMBELLISH: Jolees 3-D Embellishment stickers

I had fun making cards last night for the different challenges I am playing.  Like usual, I traded crafting for a nice long hours of sleep.  Crazy, right?  Guilty!  What can I do, I love crafting.  Now time to take my afternoon nap.
Wanna try to make an easel card?   Here's an easy to follow tutorial from Beate Johns of SCS.
Till next week...

Flourishes Timeless Tuesday (FTTC95)

Another week is over and that means another week of creating cards. This week's challenge at Flourishes Timeless Tuesday Challenge #95, is all about doilies.  You can either use those regular doilies you can buy in store or you can simply use your dies or your MS craft punch.  I'm sure alot of people were happy about this challenge.  Doilies are an elegant addition to every handmade cards and scrapbook page.
BTW, this is also my entry for Cute Card Thursday Challenge 140 - Blast from the Past!  This week's rule is to revisit one of their previous challenges.  It can be any of the challenges with the exception of the open theme weeks. Be sure to include the week number and title of the challenge in your post.
I choose Challenge 131- A Sketch by Leann.


Here's my take on this challenge:

I decided to make a monochromatic theme for my entry (white, silver and cool grey tones).  
Then I added a silver foil doily then matted it with a bigger white doily. 
The Flourishes image was stamped and embossed in a clear vellum paper then I matted it in a cool grey CS.
I'm so pleased with this card...
Flourishes stamps are so good for an elegant looking card.  
Happy I'm a collector "Smiling"...

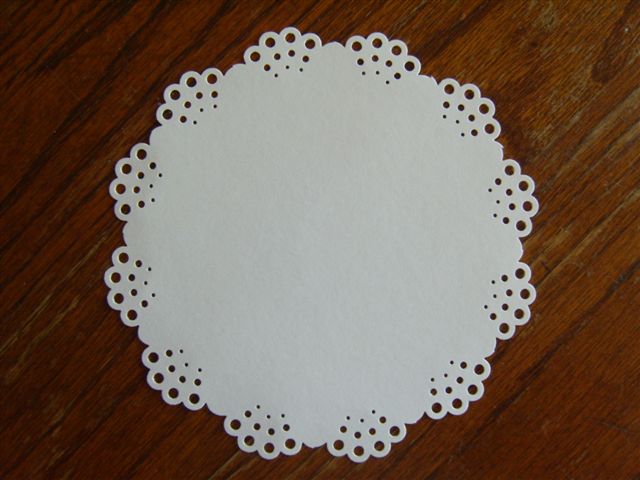
 Do you know that you can actually make your own doilies using your Martha Stewart craft corner punches?
Here, take a look... 
Well, I haven't been playing with different sizes but here's what I came up with.   


Aren't they pretty and yummy!?
The above doilies were cut in 5 and 1/2 inches in diameter using MS circle cutter. Some of the these homemade doilies were in an odd shape but guess what!?   It actually look great if you 
mix and match doilies. Try it and maybe you would like it.
Don't forget that you can make doilies using your Spellbinder dies too ( the pendant series).  Stamp stores like PTI and MFT has recently released their own doily dies too.  Another option you have is to use your Cricut machines using cartridges like Mother's Day 2010, Cindy Loo and the newly released Paper Lace. 
RECIPE:
PAPER: DCWV, American Craft, GP 110white, PTI and vellum from The Paper Company
STAMPS: Flourishes Stamps
INKPADS: Memento Tuxedo Black and Versamark
TOOLS: Cuttlebug machine, Spellbinder dies, Marvy Uchida heat tool, PC paper trimmer, ATG, and Zip Dry
EMBELLISH: Bling by Mambi, satin ribbon, vintage buttons, baker's twine and half pearls
OTHERS: Wilton doilies and embossing powder (silver)

Until next challenge.  Hugs to y'all!